Woodturning is a fun hobby that requires a precise lathe. You will need to have different skills in order to accomplish this type work. You will find some tools more effective than others. Before you can begin, it's important to know what the process involves. You will find information on the different tools and techniques that are available in this article. Learn about the prices of these tools. A lathe that is right for you can make it easy to turn in no time.
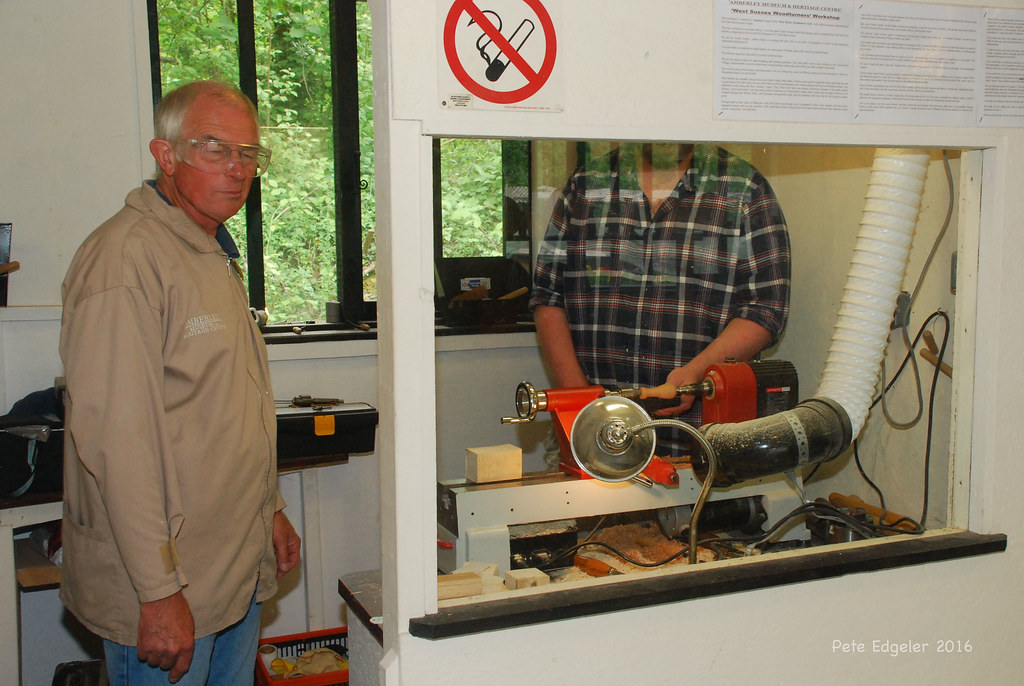
Lathe
It is crucial to make the right choice when buying a woodturning machine. A wrong machine could hinder your enjoyment of the craft. There are many options on the market and you need to know the differences between them before purchasing. These are some tips to help choose the right lathe for you.
Before you begin your project, make sure your wood is dry. Wood will turn into a stable form after several months but will warp as it loses moisture. Woodturners aren't looking for long straight boards. They prefer pieces and sometimes score them. Usually, they are looking for the figured part of the tree. You should dry your wood to a good degree if you want to create an exceptional woodturning object.
Tools
You will need a pair of saw blades, a bench and leather steel-toe boots to complete your woodturning tasks. Safety glasses must be worn by woodturners. Some tools are better suited for small items, while others may not be suitable for larger items. Others will require you to learn more advanced skills. Some woodturning tools are not recommended for large items, as they can cause injuries.

For beginners it is better to purchase individual tools than to buy several. You should ensure that the tools you buy are of good quality and will last for a long time. In the beginning, you will need a roughing saw, diamond paring tool, skew, as well as a variety of sizes. You should also invest in high quality steel tools for larger jobs. You can buy more gouges to expand your toolbox.
Techniques
The Lesson Plan for Beginners is the perfect book to help you learn the basics. This book offers step-by–step instruction with photos and illustrations showing the techniques for each project. The book's structure is based upon classroom experience. The book's structure is based on classroom experience. It covers everything from choosing timber to setting up the project, as well as the sanding procedure. You will also find a range of projects in the book to help you learn different skills.
It is a difficult process that results in imperfectly turned pieces. To avoid splitting the wood or distorting it, you need to work with the grain. Making mistakes is almost impossible to rectify. In the end, you will have to mount the piece onto the lathe again and finish it. This technique is best suited for functional work, but some artists use rough turning on some pieces, too.
Cost
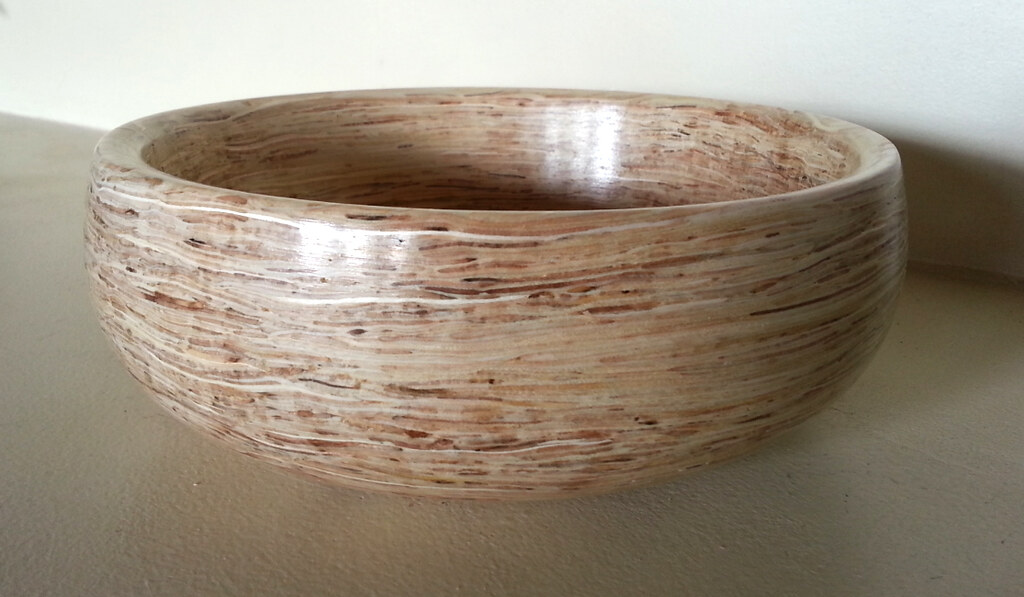
Woodturning may be a hobby, but materials are an important part of the final product. Although a $20 wood bowl is relatively inexpensive to make, the cost of making it takes about four to five hours. Wood bowl turners may not always be proud of their work. This is why it is common for them to use less quality materials or make cheaper pieces that do more damage than good. You can give $20 wood bowls to friends and relatives or donate to a nonprofit organization.
The lathe is an essential tool for turning. Although the lathe is quite inexpensive, you will need other tools and sharpening equipment to achieve the best results. For turning wood, rests and centers will be necessary. These items can cost a few thousand dollars so budget well. Woodturning supplies are a great hobby and can make any project more enjoyable.
Getting started
A few basic items are essential if your goal is to learn woodturning. A lathe is essential. Gouges and a sharpening machine are also important. Before you start learning about sharpening, however, it's important that you are familiar with what you are doing. These tips will help you begin your woodturning journey.
Work with the grain of wood first. This is often referred to as "cutting downhill" by woodturners. For example, you would cut from the outside edges of a cove to the centre when hollowing it out. If you cut uphill, it is harder to control the wood and your tool may catch. It is important to follow the instructions. Woodturning success is possible by keeping an eye on your work, and being patient.
FAQ
How can I organize my shop?
First, make sure you have a designated space for tools storage. You want your tools to stay clean and free from debris and dust. You can hang tools and accessories with pegboard hooks.
Is it necessary to be a genius in woodworking to succeed?
No. Woodworking is not difficult. It is possible to learn basic tools and techniques that will allow you to create beautiful art.
What woods are suitable for making furniture?
Woods are classified according to their hardness. Softwoods can be pine, fir or cedar. They're often used for outdoor furniture because they don't rot easily. Hardwoods include oak, maple, mahogany, and teak. They're generally used indoors because they won't weather well outdoors.
What type of tools does a carpenter use?
A hammer is probably the most widely used tool for carpenters. A hammer is used for pounding nails into wood. This helps to keep pieces together when they are working on a project. Other tools include clamps.
Can I refinish furniture that I make?
Yes! There are many different ways to refinish older furniture without the need for professional help. Here are a few ideas:
Use sandpaper for removing stains and scratches. Then wipe down the surface with a clean cloth.
Apply clear polyurethane varnish. Let dry completely before moving furniture around.
Acrylic paint can be used to paint furniture.
You can stain the furniture instead of using paint. The stain will give the furniture a rich look.
Apply shellac wax. Wax will protect the wood and add shine.
What material would you recommend to start learning woodworking?
Start off with softwood like pine and poplar. Once you feel comfortable with these two, move on to hardwood.
How do you calculate woodworking costs?
It is crucial to keep project costs as low-cost as possible. Always ensure you are getting the best possible price for materials. It's also worth taking into account all the other factors that may affect the cost of your projects, such as time, skill level, and experience. To get an idea about the average cost for common household DIY tasks, see our guide to the average woodwork project price.
Statistics
- If your lumber isn't as dry as you would like when you purchase it (over 22% in Glen Huey's opinion…probably over 10-15% in my opinion), then it's a good idea to let it acclimate to your workshop for a couple of weeks. (woodandshop.com)
- The U.S. Bureau of Labor Statistics (BLS) estimates that the number of jobs for woodworkers will decline by 4% between 2019 and 2029. (indeed.com)
- Average lumber prices rose about 600 percent between April 2020 and May 2021. (familyhandyman.com)
- In 2014, there were just over 237,000 jobs for all woodworkers, with other wood product manufacturing employing 23 percent; wood kitchen cabinets and countertop manufacturing employing 21 percent. (theartcareerproject.com)
External Links
How To
How to stain hardwood
Staining wood is the process of applying chemicals to the wood's exterior, which alters its color. This chemical reaction causes the wood to change from white to brownish red. Oak is the most common wood type for staining. However, you can also use other wood types.
You can apply wood stains in many different ways. You can mix the stain with a solvent, such as turpentine, and spray it onto the wood. Other methods use a solution of water and dye applied directly to the wood. The stain can be mixed with paints and varnishes to become part of the final coating.
Preparing the surface is the most important step in staining wooden surfaces. To apply the stain, clean the wood completely. Sanding can smoothen out scratches and uneven spots. The next step is to determine the type of stain you would like to use. There are two main kinds of stains available: non-penetrating stains and penetrating. Penetrating stains penetrate deeper into the wood than non-penetrating ones, making them ideal for dark colors such as mahogany. Penetrating stains are best paired with lighter colors, such as maple.
You will need to decide on the type of stain you want to use, and then prepare your tools. The best tool for applying stains is a paintbrush. It allows you to evenly distribute the liquid over the surface. After you're done painting, make sure to have some rags handy to remove any excess stain. If you plan to mix the stain yourself, make sure you have enough containers available to hold the different components of the mixture.
Once you have prepared all your materials, it is time to clean the areas where you will stain the wood. Clean the area with soap and warm water to get rid of dirt and grime. You can wipe down the entire furniture using a damp rag with clean water. Take care to remove all debris and dirt, especially if you are planning on staining darker wood.
Next, spray the stain. The stain can be applied by spraying or brushing the stain onto one end of the furniture. Move slowly and carefully along the grain of your wood until you reach its opposite end. You must be careful not to allow the stain to drip off the wood's edges. Before moving on to the next steps, allow the stain drying completely.
To protect the painted surface, apply a coat of clear polyurethane sealant. Apply three coats polyurethane sealer. Allow the third coat to dry overnight before sanding the final coat.