The art of woodworking does not seem to be dying. Many woodworkers continue to use traditional methods like cleaving/riving, breaking, and splitting. Cleaving and riving involve splitting the wood vertically, following the grain, and does not break fibers. These techniques are done with a traditional hand tool known as a "froe", but axes, wedges and other tools can be used. It is important to not waste any materials.
Hewing
Hewing is a traditional woodworking method that has not been lost. It's a technique that involves splitting logs vertically along the grain, but doesn't break the wood's fibers. Traditional hand tools used in hewing include a froe and wedges. Using the froe and wedges allows the hewer to precisely measure the timber in the log at two ends.
The fundamental skill of greenwoodworking is to hew, or cut a log into lumber. It's an old technique that is enjoying renewed popularity, as more people turn to greenwoodworking. This method was used for timber framing long before the advent and widespread use of sawmills. It's still used to make square beams. Even if you don't plan to build a house, it may not be necessary to purchase finished lumber. This skill is worth learning.
Modern woodworkers heavily rely on machinery and large infrastructure to make woodwork products. However, traditional methods of hewing are still very much in use. A lot of woodwork originated as vernacular crafts and made extensive use the metamorphic characteristics of wood. Woodworkers are responsible for producing most household items. While modern woodworkers use industrialized methods, they still need a great deal of knowledge and skills to tame trees. You can make a difference for the environment by working with them the old-fashioned way.
cleaving
Green woodworking's principles date back to humankind's first encounter with timber. As they preserve the fibers of the tree's length, the first steps to green woodworking include splitting and cleaving. Hand tools are necessary, including a drawknife and pole lathe. To rough-shape chairs, an adze can also be used.
Strong structures are the most important feature of cleftwood. You will need a froe or sharp tool to cleave the wood and separate it. Freshly cut wood is best for cleaving, as it will be easier and more efficient to use. Woodworkers may use many different tools and equipment in order to create many objects.
The process of splitting logs is very similar to ripping wood, but the method is a little different. A froe is used to cleave logs instead of an axe. It's safer and more efficient. A froe has a blade that is placed on the wood and stuck with the mallet. The handle acts as a lever to increase force and can be used to guide the split in a particular direction. You must start from the end to split a log. Then work your way up.
Hewing break
Hewing is the process by which a log is turned into lumber with an axe. Hewing was the traditional method for shaping beams prior to the invention of sawmills. This process continues to be used occasionally for timber framing. People save money by cutting their own lumber, and often don't pay for the finished lumber. This is a traditional practice and it is also considered to be environmentally friendly. Read on to learn about the benefits of hewing.

Wood that's more difficult needs to be worked harder. The saw blade could be too hot if wood is too soft. Choose hard woods such cherry, fruitwoods, and maple. You should ensure that you choose a clean log without any defects. Look closely at the bark as well as the end grain. If you need to, you can use a maul and wedges to split it. Look for a cool feel when it is cool.
Green woodworking isn't for you if your are just starting out. Even though unseasoned wood may be readily available, you should learn how to take care of it and use the right tools. Because it is more difficult to work on, avoid using figured timber. For best results, choose oak or ring-porous wood. For straightest wood grain, forest-grown trees have fewer knots. This woodworking method is both environmentally friendly and beneficial for our lives.
FAQ
What tools should you start with to become a woodworker
Woodworking is an art. It requires patience. It takes time to master all the tools and techniques involved in woodworking.
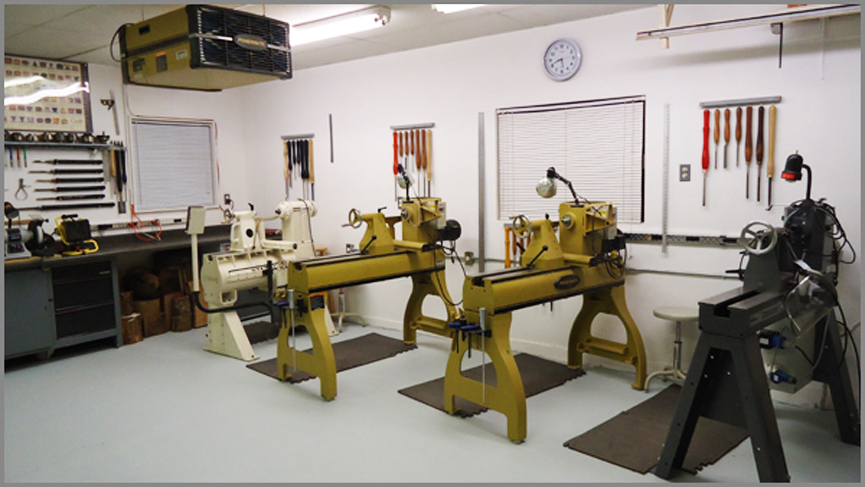
There are many options for woodworking equipment today. Some people prefer using power tools while others prefer hand tools.
Your choice, however, is up to you. However, you need to ensure that the tool you use is the right one for the job. It may be a good idea to start with a basic set, if possible, if you don’t know much about hand tools.
You could also try learning how to use a router which is used to cut intricate shapes into wood. These tools can be purchased at most hardware stores.
How do I know what tools are best suited for me?
It is important to consider your needs and preferences when shopping for tools. Do you prefer metal or plastic handles? What size screws and nails do you use most often? Would you rather use hand tools than power tools?
How can I keep my shop organised?
A designated place to store your tools is the first step towards keeping your workshop clean. Keep your tools away from dust and debris, so they stay sharp and ready to work. You can hang tools and accessories with pegboard hooks.
Is it possible to open my own woodworking shop?
Starting your own woodworking business isn't easy. You will need to adhere to many legal requirements. It doesn't mean that you have to go through the entire process of starting a business. Many people join already-established businesses. This allows you to join existing businesses and pay only membership fees.
You can learn how to woodwork.
It is best to do it yourself. Woodworking is an intricate art form that requires practice, skill, patience, and experience. It takes time to master any craft.
Learning how to do something is best done by doing it. Start small and use what you learn.
Statistics
- The best-paid 10 percent make $76,000, while the lowest-paid 10 percent make $34,000. (zippia.com)
- Average lumber prices rose about 600 percent between April 2020 and May 2021. (familyhandyman.com)
- Woodworkers on the lower end of that spectrum, the bottom 10% to be exact, make roughly $24,000 a year, while the top 10% makes $108,000. (zippia.com)
- The U.S. Bureau of Labor Statistics (BLS) estimates that the number of jobs for woodworkers will decline by 4% between 2019 and 2029. (indeed.com)
External Links
How To
How to stain wood
The process of staining wood involves the application of chemicals to the wood's surface, which causes it to change its color. This chemical reaction causes the wood to change from white to brownish red. Although oak is the most popular type of wood to stain, there are many other types that can be used.
There are several ways to apply stains to wood surfaces. You can mix the stain with a solvent, such as turpentine, and spray it onto the wood. Others use a solution made up of water and dye, which is then applied directly onto the wood. You can mix stains into varnishes or paints to make them part of your finish coat.
Preparing the wood surface is the first step to staining it. Clean the wood to get rid of any grease, dirt or other substances that might be detrimental to the stain's application. Sanding the wood removes scratches and imperfections. You must then decide on the type of stain that you wish to use. There are two basic kinds of stains: penetrating stains and non-penetrating stains. Penetrating stain penetrates deeper into wood than nonpenetrating, making them suitable for dark colors like mahogany. Non-penetrating stains work best with light colors like maple.
You will need to decide on the type of stain you want to use, and then prepare your tools. Paintbrushes are great for applying stain because they allow you to evenly spread the liquid across the surface. It is a good idea to have rags on hand in case you need them to clean up any stains that may remain after you have finished painting. If you plan to mix the stain yourself, make sure you have enough containers available to hold the different components of the mixture.
After you have prepared your materials for staining, clean the area. Use soap and warm water to remove dust and grime. Use a dampened sponge and warm water to clean the entire piece. Take care to remove all debris and dirt, especially if you are planning on staining darker wood.
The stain should be applied next. The stain can be applied by spraying or brushing the stain onto one end of the furniture. Slowly and carefully work your way along the grain to reach the opposite end. Make sure that the stain does not drip off the edge of the wood. Before you proceed with the next steps, let the stain dry completely.
A coat of clear polyurethane sealing agent is applied to protect the paint. Three coats of polyurethane sealing agent are required. Allow the third coat, which should dry overnight, to dry before sanding.