There are many ways you can carve a gnome. Before you begin carving, here are some key points to keep in mind. The carving process is enjoyable and rewarding. This project requires many layers, and it is a great way for beginners to learn how to carve an gnome. There are many creative ways to enhance your gnome carving. Here are three ways to carve a gnome from wood.
A gnome can be freehand carved
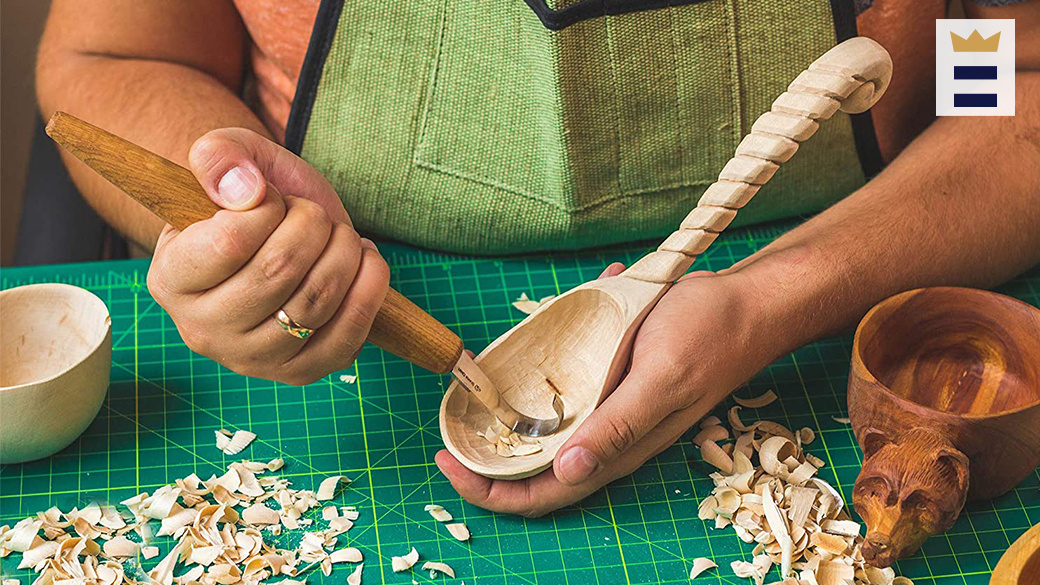
Here are some tips for freehand carving a gnome as a Christmas ornament. You can easily carve a simple gnome using a knife. But, if you need to add detail to the hat or beard, a micro-V-tool is essential. A gnome is easy to carve and can be done in your spare hours.
A gnome is an excellent way to demonstrate your skills in freehand carving. These gnomes were popular garden ornaments and are still very much in demand. Carving a gnome from wood is a great way to gauge your skill and see where you need to improve. You can also use it as a measuring stick to determine design, depth, detail, or design. Once you're comfortable with the gnome drawing, it's time to start sculpting him.
Whistle carving is a project that every woodcarver should try.
A whistle is a great project for woodcarvers. A whistle, which is simple and functional, can be fun to carve. It's also a great way to introduce people to the craft. If you want your whistle functional, there are some important steps that you should follow. This tutorial will walk you through the process of carving a whistle.
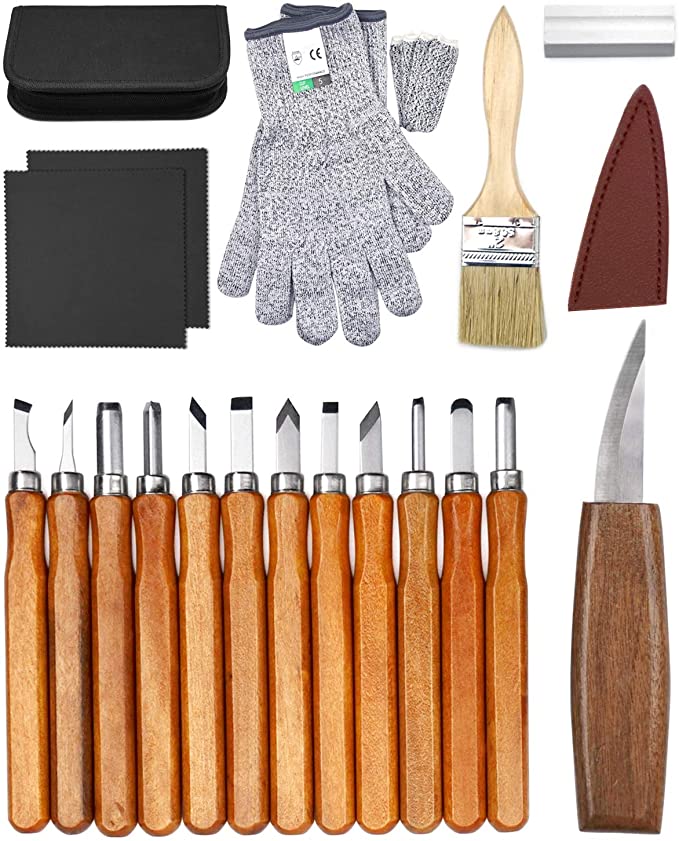
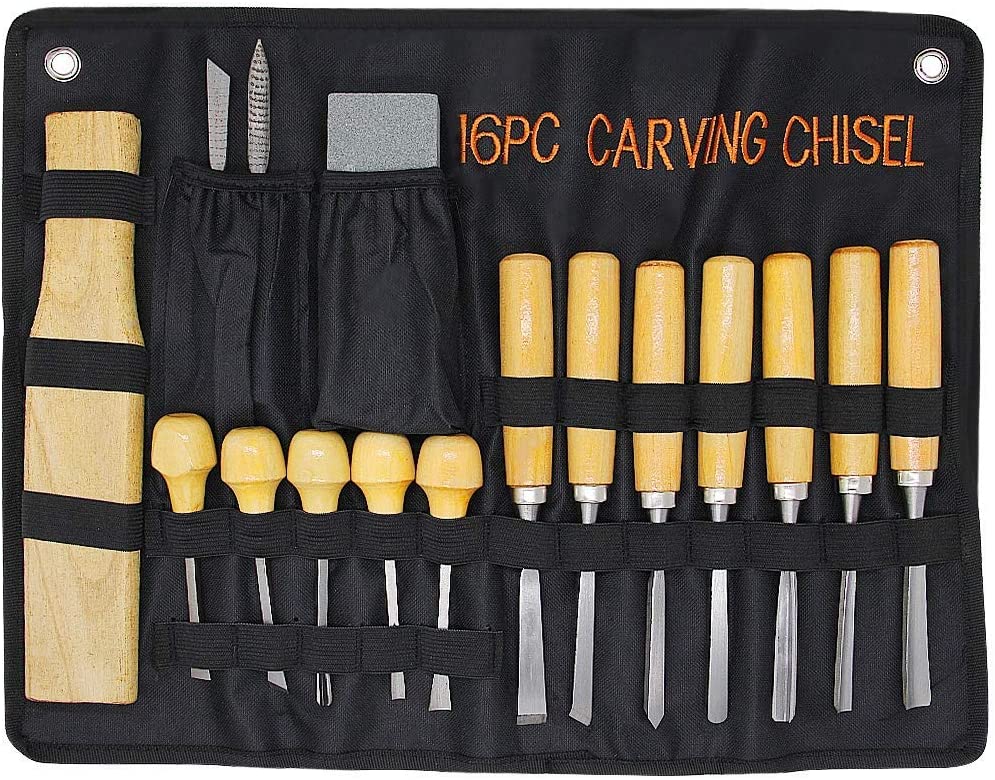
To start the project, you'll first need a straight edged knife and nontoxic oil. It may seem intimidating, but carving a Gnome is an easy project that will increase your woodcarving skill and provide you with a creative outlet. This project is also a great beginner project, because it allows you to try many different woodcarving techniques.
Creative gnome carvings: Add creativity
You can easily add creativity to your gnome carvings by adding a colorful cap. A wood-carved wooden gnome might be a whimsical decoration. But a sneering, angry troll could make your heart melt. Gnomes add personality and charm to your garden. They can be made from wood, stone and other materials.
Creating a gnome out of wood
Before carving a gnome of wood, it is important to first determine the size of the block. Drawing the anatomy of your gnome will be easy. It will include the face, body as well as the feet, belt and hat. You will need to make a V-cut around the facial features to create smooth corners. Using a chisel or knife, make V-cuts in the appropriate places. Use a micro-V-tool to cut a 1.5mm piece of wood. This will give you a nice curled edge for the beard and hat rim.
Remember that carving gnomes is a simple project. You have the potential to produce excellent work. Every week, you'll see progress in carving a new gnome. While this may not happen with every project, weekly carving progress will allow you to make noticeable improvements in design, shape, and facial features.
Adding a gnome to a world of gnomes
Gnomes in the Underdark and other RPGs typically have one consistent character: David. This character is not insane. Telepathy, Can Talk Fluently With Animals, and Can't Argue w Elfs are just some of his traits. He can also put up road signs to scare people off. David and Lisa might even be in a rivalry.
As powerful casters, gnomes are also very adept at arcana. In addition to this, they're the only playable race in the game. Other gnomes, like undead and leper gnomes, share the same skeleton animation. Kirin Tor has always been home to gnomes. Meryl Felstorm was the founder of their organization and had a gnome in his circle.
FAQ
What kind of wood should you use?
The most commonly used woods for woodworking are oak, maple, cherry. Each wood type has its own characteristics which affect the final product's appearance and feel. Oak is a darker wood and tends to be more durable than other types. Birch is light and soft, while mahogany can be heavier and more dense. You also have the option of solid wood or veneers. Veneers consist of thin sheets made from wood and glued together to form a single layer.
How often do I need to buy new supplies
Some tools will need to be replaced over time. If you are using hand tools, you will need to sharpen them frequently. And if you're using power tools, you'll need replacement parts periodically. Avoid buying too many products at once. Spread your purchases out over several months.
What would be your first step in woodworking?
Start with softwood like pine, poplar and ash. You will feel more comfortable with these softwoods, so you can move onto hardwood.
Statistics
- In 2014, there were just over 237,000 jobs for all woodworkers, with other wood product manufacturing employing 23 percent; wood kitchen cabinets and countertop manufacturing employing 21 percent. (theartcareerproject.com)
- Overall employment of woodworkers is projected to grow 8 percent from 2020 to 2030, about as fast as the average for all occupations. (bls.gov)
- Average lumber prices rose about 600 percent between April 2020 and May 2021. (familyhandyman.com)
- If your lumber isn't as dry as you would like when you purchase it (over 22% in Glen Huey's opinion…probably over 10-15% in my opinion), then it's a good idea to let it acclimate to your workshop for a couple of weeks. (woodandshop.com)
External Links
How To
How to drive a nail through wood
It is essential to pick the right size and style of hammer before you can drive a nail in wood. There are many types of hammers that you will find: claw hammers and sledgehammers; mallets; ball peen hammers; and hatchets. Each kind of hammer has its own advantages and disadvantages. A claw hammer works well when you're trying to hit nails with a heavy hammer. However it is difficult to precisely control where the blow hits. The sledgehammer works well for large areas, but is too heavy for smaller tasks.
After choosing the right hammer, place your hand flat against the side of the head so that the handle rests comfortably in your palm. Grab the handle tightly, but do not squeeze too hard. Keep your wrist relaxed and the hammer straight up. You should then swing the hammer straight up, keeping your wrist relaxed. You should feel the impact from the hammer striking a nail. Try practicing with a block to help you master the art of swinging a stick.
You can now drive the nail by holding the hammer to your body. Place the nail so that it is perpendicular with the wood's surface. Keep your attention on the tip. Swing the hammer forward, then follow through with the motion of the hammerhead. You can repeat this several times, increasing your swing speed. When you are confident with the technique, add power to your swings. To make it more powerful, hold the hammer up high to your shoulder and then bring it down. You'll have more energy to work with.
Once you've nailed the first hole, remove the hammer from the nail. To remove the remainder of the nails, you can use a screwdriver/pry bar. Keep the nails heads in line with the surface of the board to prevent splitting the wood.