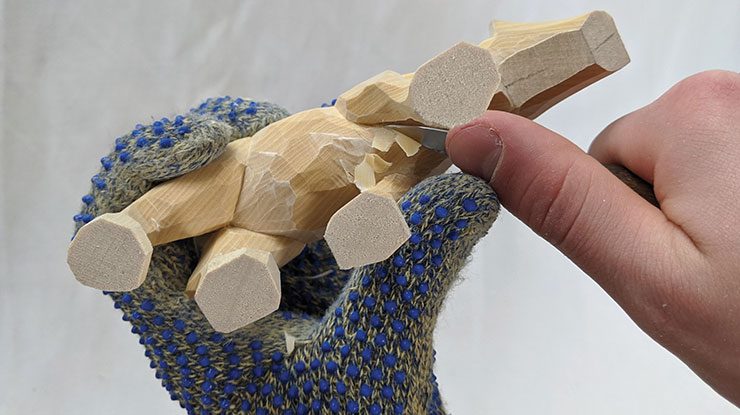
If you've ever wanted your own carvings, it's possible to follow along with a photo-trail. This can help you to imitate a famous carving without having to spend hours researching the styles. You want your eyes and hands to look as natural as possible. It will also be very enjoyable. Don't worry if you haven't been a skilled carver before. There are many methods to create realistic-looking eyes.
Lesson 4 - Carving hair
This tutorial will teach you how to create beautiful flowing hair for your animal carving. It will help create a realistic appearance that evokes lifelike emotions. It will show you the various tools you can use in order to create different textures. Learn how to use different curved instruments to create different levels. Once you've mastered the basics of hair cutting, you can move on to more difficult parts like the eyeballs or nose.
With a pencil, draw the eye cavities. Next, draw a straight line extending from the eyelids and eyebrows. You can also use a pencil to draw small squiggles to make the forehead higher and rounder. Then, trim your beard with a sharp sloyd or whittling knife.
Lesson 5 - Carving crow's feet
Crow's feet can be a sign of crows feet. Learn what causes them. Repeated facial expressions such as squinting, can lead to wrinkles. Crow's feet are caused by repetitive facial expressions like squinting. To prevent crow's foot, you can also use facial moisturizers.
People look older than their actual years due to fine lines and wrinkles in the face. Thankfully, you can easily remove these lines to reveal a younger-looking complexion. These are some tips to help you get rid of those lines.
Lesson 6: Carving iris

For this lesson, children can look at the iris and ocellus in a mirror to see how they appear and feel. They can also draw their eye using observational drawings and the mirror. They can also look for white and different shades in the central black. They can then add colour to the drawing using different media, trying to create the illusion that there is depth. Children can then compare the colours in their eyes by looking at one another's drawings.
FAQ
How long does it take you to finish a piece?
It all depends on how large the furniture is. Smaller projects like boxes and picture frames can be finished within one day. Larger projects such as tables and desks can take several days to complete. It takes time to stain and seal the wood properly.
You can learn how to woodwork.
Learning by doing is the best way of learning anything. Woodworking is an art form that requires patience, practice, skill, and experience. To master any craft, it takes time.
It is the best way to learn to do something is to actually do it. Start small and then build upon what you've learned.
How much will it cost to get started?
There are no exact numbers because every project is different. But if you want to get an idea of how much money you'll need, consider these factors:
-
Material costs
-
Tools and equipment
-
Time spent on the Project
-
Your hourly rate
-
How much profit can you anticipate to make
-
No matter if you are looking to hire someone
It's a good idea for beginners to start with small projects like frames and boxes. You'll become more proficient as you get experience.
What's the difference?
Hobbyists enjoy making things out of wood, whereas professionals focus more on the quality of their work. Hobbyists are proud of their creations and will often share them with family members and friends. Professionals will spend hours looking at designs before they start to build a project. They'll be meticulous about every aspect of their work, from choosing the best materials to finishing it perfectly.
Do you have any advice on how to start a woodworking business.
It takes a lot of effort to start a woodworking business. You won't mind working hard if your hobby is something you love. You might even enjoy running your own business.
Remember that you may encounter unexpected problems when starting a new venture. For instance, you might run out of money unexpectedly. Perhaps customers won't pay you as much as you had hoped. These situations are necessary for survival.
A good tip is to open a separate bank account for your business. You'll be able to track how much money comes in and out.
What type of wood should I choose?
Woodworking is a popular job that involves oak, pine and maple. Each wood type has its own characteristics which affect the final product's appearance and feel. Oak, for instance, is darker and harder than most other woods. Birch is soft and light, and mahogany is denseer and heavier. You can also choose from solid wood or veneers. Veneers are thin wood sheets that are glued together to form one layer.
Statistics
- The U.S. Bureau of Labor Statistics (BLS) estimates that the number of jobs for woodworkers will decline by 4% between 2019 and 2029. (indeed.com)
- Woodworkers on the lower end of that spectrum, the bottom 10% to be exact, make roughly $24,000 a year, while the top 10% makes $108,000. (zippia.com)
- The best-paid 10 percent make $76,000, while the lowest-paid 10 percent make $34,000. (zippia.com)
- Overall employment of woodworkers is projected to grow 8 percent from 2020 to 2030, about as fast as the average for all occupations. (bls.gov)
External Links
How To
How to properly use a handsaw
Hand saws are used to cut the wood into pieces. The most common types of hand saws are circular saws, jigsaws, table saws, band saws, saber saws, crosscut saws, miter saws, and rip saws. A handsaw can be made of metal or other plastic. It cuts through material such as wood and plastics.
A hand saw has the advantage of being able to cut at any angle and without having to adjust the blade. The blades can also be sharpened easily, which is not possible with power tools. They do have their disadvantages. These devices are bulky and heavy so you need to be careful when transporting. If you are not familiar with how to use one you may injure yourself.
There are many ways you can hold a saw. While cutting, it is important to keep your hands clear of the blades. If you don't, you might get hurt. You should hold the saw with your fingers close to the handle. Your thumb should be at the top of your blade. You won't accidentally touch it.
Never place anything under a piece of wood that you're cutting with a handsaw. This could cause the blade to slip from the wood's surface. Before you start cutting, ensure that you inspect the area. Check for nails, screws and other objects underneath the wood.
Always wear safety glasses when you use a handsaw. They protect your eyes from dust, which makes it easier to see what is happening. Safety glasses can also be useful as they protect your skin from flying debris.
First, learn how to safely use a hand saw. You can then practice until you are confident enough to cut things. Once you know the basics, it will be easy to cut anything.