
A bowl gouge can be used to carve or smoothen the bowl's surface. The size and shape of the bowl gouge will determine what type of work it can do. A leaflet with instructions comes with the gouge. It comes with a forge tip that can be used to make rough cuts in the interior or outside of a bowl. The gouge is also made with a balance and edge for fine projects. It is made out of high-quality, steel.
Shape
A bowl gouge is a sharp tool that is used to shape bowls. It is usually made of wood, and can be quite costly. You can find a gouge in your local home centre for as little as a couple of dollars. This wood is easy to work with and can be used for several exterior cuts and hollowing. You might want to start bowl making by using a 2x6 basic piece. It is a great choice for beginners because it is affordable and easy to work with.
There are many shapes of bowl gouges. A basic bowl gouge is 5/8" in diameter, while a 3/4" gouge is a little larger. Although bigger tools are generally more efficient they do not necessarily make a better tool. It is important to try different sizes and gouges until one works best for you. Every turner has a preferred grind. You should experiment with various tools until you find the one that works best for them.
Size
There are two systems that size bowl gouges. English and North American systems determine the size of gouges by their diameters and flute width. One system labels a gouge as 1/2" while the other uses 5/8” or 1” diameter. This difference in measurements makes the gouge more precise, and can help you choose the right size for your lathe. To choose the proper bowl gouge, first determine the diameter of the bowl you're working on. Then, decide the appropriate size based upon the size and flute of the gouge.
Although there are many benefits to using a larger bowl, they can be heavier and bulkier than smaller ones. For this reason, beginners should buy a smaller one and increase their size gradually. You should limit your choices to a single size for experienced woodworkers. Once you master your woodworking skills, you can invest in larger bowl gouges if you wish. They are also more difficult than their stainless counterparts but require less maintenance.
Function
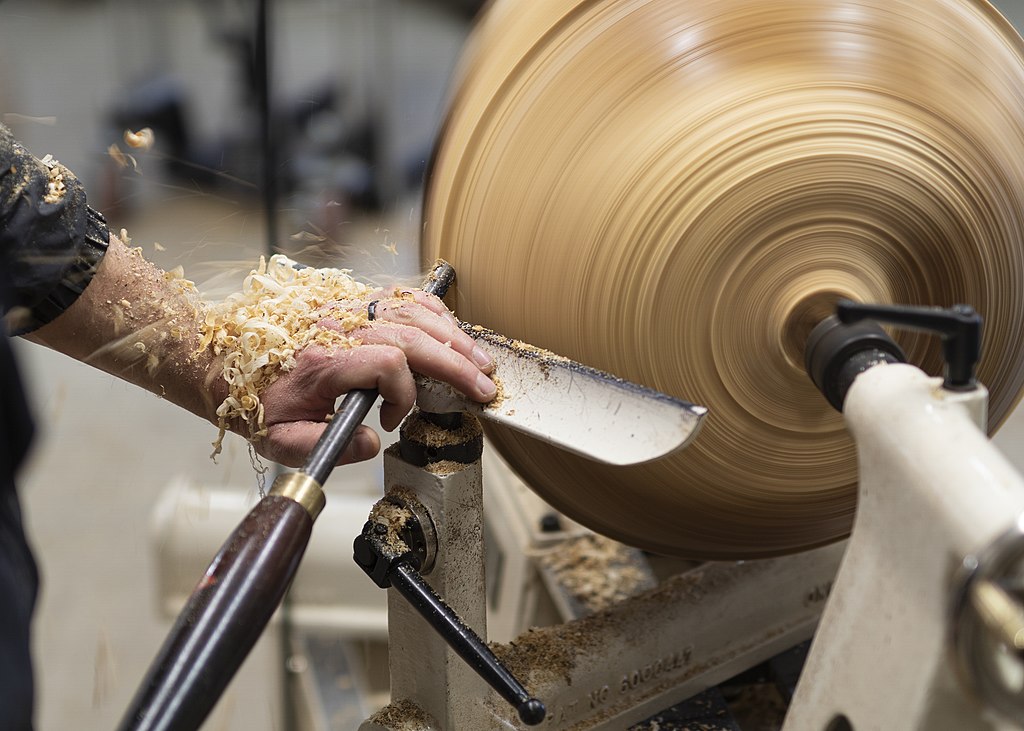
A bowl gouge has two functions. First, it prepares the outside surface of the bowl for sanding. The tool rest pivots the left wing of this gouge. The cutting edge touches the wood when the handle is raised. The cut is then released from the wood, leaving a smooth surface that's ready to sand. Secondly, a bowl gouge has a single cutting edge: the bevel.
A bowl gouge's bevel angle can vary from 40 to 45 degrees. This can vary depending on what circumstances are at play. For example, for turning large bowls, larger bevel angles are better. Then, smaller angles can be used for cutting beads and spindles. The angle you choose depends on the purpose of the tool. A large bevel angle can cause damage to the wood and make it difficult to find the right angle.
Handle
Keep the bowl gouge handles against your body when you cut bowls. This will help to maintain the bowl's curve. Swing the handle to create a convex curve in the bowl, while holding the tool rest firmly with the left hand. You can adjust the height of the tool-rest to achieve the desired depth or width. Depending on the dimensions of the bowl, a sharp saw should be able cut up to 1 inch into the bowl.

A bowl gouge has a bowl-shaped shaft made from a rod of steel that is then machined into the desired shape. It often has a concave area or flute that is hollowed out during milling. While some bowl gouges come with handles made of hardwood, there are other options. Some bowl gouges feature a large handle that makes it easier to slice large areas.
FAQ
Are there any tips for starting a woodworking enterprise?
It takes a lot of effort to start a woodworking business. It's worth it if you're passionate and willing to work hard. You might even enjoy running your own business.
You should remember that unexpected issues may occur when you launch a new venture. For instance, you might run out of money unexpectedly. Maybe customers won't be willing to pay what you want. To survive, you'll need to be prepared for such situations.
A good tip is to open a separate bank account for your business. You will always know how much money you have coming in.
Are you able to teach yourself woodworking
You can learn everything best by doing. Woodworking requires patience, practice and skill. To master any craft, it takes time.
To actually learn something is the best way. Start small and then build upon what you've learned.
What is the average time it takes to finish furniture?
It all depends on how large the furniture is. A smaller project like picture frames or boxes can be completed in a single day. Larger projects such as tables and desks can take several days to complete. It takes time to stain and seal the wood properly.
Statistics
- Overall employment of woodworkers is projected to grow 8 percent from 2020 to 2030, about as fast as the average for all occupations. (bls.gov)
- Most woodworkers agree that lumber moisture needs to be under 10% for building furniture. (woodandshop.com)
- If your lumber isn't as dry as you would like when you purchase it (over 22% in Glen Huey's opinion…probably over 10-15% in my opinion), then it's a good idea to let it acclimate to your workshop for a couple of weeks. (woodandshop.com)
- In 2014, there were just over 237,000 jobs for all woodworkers, with other wood product manufacturing employing 23 percent; wood kitchen cabinets and countertop manufacturing employing 21 percent. (theartcareerproject.com)
External Links
How To
How to make wooden joints
This tutorial will show you how to join two pieces of wood together. We will use the pocket hole joint, which is drilling holes in the wood to join them. This method is great if your wood's straight and smooth. Try dowel joinery instead if your wood doesn't look straight. These are the steps
-
Drill Pocket Hole Joints. To start, measure and mark where you want to put the pocket hole joint. Then drill 3/4 inch deep holes into the ends of each piece of wood using a jig saw or handheld drilling machine.
-
Sand Smooth. Sanding the wood's edges will help ensure that the joint won't split later.
-
Glue together. Apply glue to both sides of the wood. Allow the wood to rest for five minutes before clamping it together.
-
Attach the Pieces together. After the glue has dried thoroughly, secure the pieces so that they are flush.
-
Trim Joinery. Trim the excess wood around the joint after the glue has dried completely.
To be able to turn the pieces inside-out, leave enough room between them.